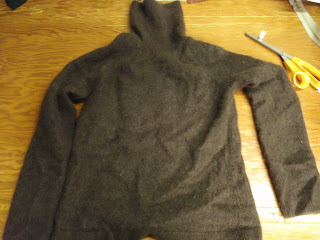
I have had this sweater for awhile but I rarely wore it because it was a
bit too small. I hated to give it away because it was so soft and warm,
but something had to be done.
When Pattern Review announced the 'Re-Fashion Contest', I knew it was time for the transformation.
I felted the sweater futher to make the finished headwear even warmer.
 |
| After shrinking further. |
I'd seen a picture of the Eugenia Kim's Haircut cloche several years ago and immediately bought the book (for awhile I was all though, no action. I'm hoping this is the start of much, much more productiveness).
 |
| Saturday Night Hat |
|
|
|
|
|
This is the cloche that started it all.
 |
| The inspiration. |
The book calls for a milliner's hood so I made my own using a pseudo-watch cap shape.
 |
| Cutting out the haircut cloche. |
|
|
|
|
I tried on the hood to determine how short to cut 'the fringe'.
 |
| The Jabba-the-Hut stage. |
I cut a wedge out of the back as well.
 |
| Trimming to shape. |
If I added horns, I think it would resemble a viking helmet, (what's bred in the blood...) but without I think I look like a seal. Considerably less threatening, I guess.
The side view is ok, if a little severe (as if looking like a viking isn't severe enough).
The pattern for the second cap came from
this cap tutorial.The instructions were easy to follow and I found it a simple project. It would have been quick too if the top piece of the brim would have cooperated and stayed in the seam allowance. It lost in the end and really should have known better that to argue with a viking.
I used part of a vinegar jug to make the stiffening for the peak.
 |
| A vinegar jug donated the peak stiffening. |
I didn't want to risk losing several (?dozen) needles sewing the brim and stiffening together so I drilled small hole in the stiffening and inserted the stiffening into the sewn peak.
 |
| Drilling holes to secure the peak to the fabric. |
The edge was whip-stitched with embroidery cotton and sewn onto the cap.
I didn't interface the cap band because I wanted a floppy cap, but I used interfacing and a second button to prevent the decorative button from pulling through the band.
Once the button was on, I catch-stitched the inside band to the top of the hat. The original instructions said to stitch-in-the-ditch but it always looks like I accidentally drove into the ditch, and tried desperately to escape when I do that. Catch-stitching, to my eyes, looks much better than the other method.
 |
| The button is from a mixed bag I picked up at the MCC. |
In spite of my careful measuring, the cap was too big for me. Oh, the fates are capricious at times.
It did, however, fit The Geek nicely and looks very good on her. I would
suspect sabotage, but she wasn't at home when this was being made.
Tho' that smirk makes me wonde!


