Sunday 15 November 2015

SWAP 2016?

Note to self:  I've put these fabrics in a separate drawer so I can find them more easily come February.

Briefly: Several of the blogs I read have been talking about Sewing With a Plan or SWAP. Last spring I watched those same bloggers make some lovely garments and I'm toying with the idea. myself. I have mentioned before that I am not really a joiner - more of a lurker, so I'll have to see if I commit (in writing) or not.

The rules about what to sew are copied straight from the Artisan Square site or you could follow the link above.

1 "3 pack" of Color(s) A (3 garments)
1 "3 pack" of Color(s) B (3 garments)
1 "Combo Pack" of Colors A & B (2 garments)
1 "3 pack" of Wild Cards

A "3 pack" will be:
2 tops + 1 bottom
or
1 top + 1 bottom + 1 outer layer
or
1 dress + 1 top + 1 bottom
or
2 bottoms + 1 top
or
Two dresses & one layer.
or
The final 3 pack option is 1 dress + 1 top OR bottom + 1 layer.


The "Combo Pack" can be just about anything, but they must be garments, not accessories (scarves, belts, bags, etc).  The "Wild Cards" can also be any color, or any color combination,  but for this to work they will need to follow the format of one of the other "3 packs".  That is, you'll need more tops, bottoms, or dresses to make the wardrobe work.


The rules this year seem highly manageable, so I have rummaged around the sewing room and this is what I think I can do.

Pack A: a pair of shorts and two tops.


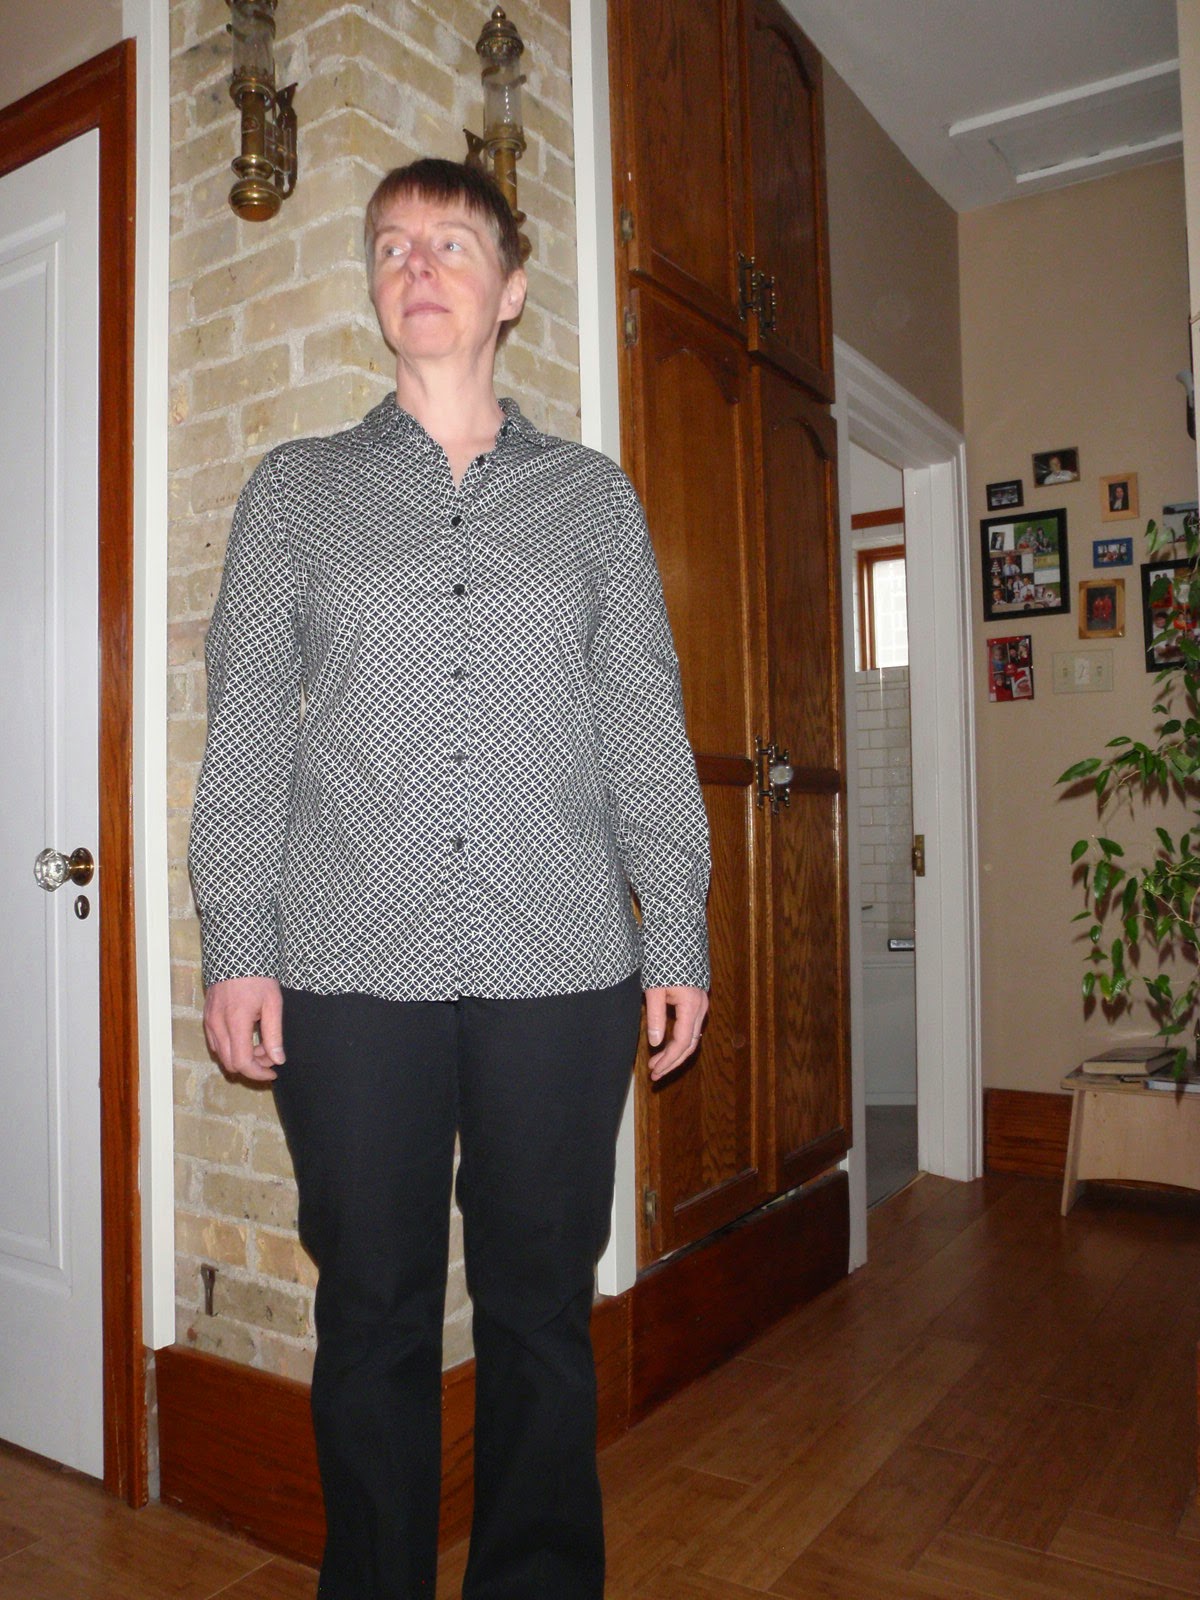
Pack B: either a skirt or trousers and a blouse. Since we are allowed to use two previously sewn items I may use the window-check blouse from this summer.

 Combo Pack: two dresses.

Wild cards: orange shorts or skirt with a white t-shirt and possibly the 'skeleton key' Oakridge blouse I made earlier this year

These clothes are mostly for casual wear on the the weekends. I am trying to look a little less rumpled on my days off; now I just throw on...whatever... and run out the door.

There has to be some work-wear sewing before all this starts. I find sewing summer clothes so much more exciting than winter clothes, but I still have to go to work, and there are some brighter colours in here. I had plans to sew this fabric for last winter, but obviously that didn't happen. Let's see what I accomplish this year.

Monday 28 September 2015

Vintage Late Summer Flower Dress

Note to self: next time make some attempt to pattern match.

Briefly: This is another combination of two patterns, Style 4892 and Style 4980, that I tried last July.

The only thing I did differently was to lengthen the front bodice by about half an inch.

I was so sure the dress was mostly purple, but looking at it now, it looks more blue and turquoise. I should wear my blue stockings and not the purple ones; next time -next year.
I should take in the sides a little more around the waist -it bunches more in the back than the last one did.

Sunday 16 August 2015

Not Really Sewing Weather

Holy Smokes it's been hot here! (Please note: that is not a complaint, it is a comment. When I say "Holy Smokes it's been cold here!", that is a complaint.) Never the less, the heat has not been conducive to sewing. When you can break a sweat standing still wearing nothing but a sports bra and a loose cotton skirt, that's hot. And we don't have air conditioning so the house was about 31 degrees C yesterday. (I usually close the windows early in the morning so the house, cooled overnight, usually stays at about 26C, but yesterday we were out longer than I thought -hence the 31 degrees.) One further comment? Our high yesterday was 33C with a humidex of 46C. We prairie folk are not used to that kind of humidity.

Anyway, enough blather. I have managed to sew two other versions of my prototypes.
One is another Oakridge with the back narrowed by an inch (do you like my mix of metric and Imperial measurements? Confusing, eh? Welcome to my life) but next time I might only do 3/4 of an inch, which was my original plan.

I've noticed people don't pay much attention to prints. I've worn this blouse a couple of times but no one noticed the spectacles until the second go round. Maybe they're distracted by the single red button. The one-of button was semi-intentional. I needed one more button but didn't have enough of the grey ones and red seemed like a good choice.

The other is a second version of the Edith blouse with a collar and an increase in the back width of about 3/4 of an inch. (Since one cannot destroy or create matter, I figure I am keeping the archaic laws of physics in balance with these changes.)
My lazy photography; no human model. Here Edith 2 is freshly washed and not yet dry, hanging on my clothesline with the vine monstrosity in the background.

Hopefully we will have a few more weeks of summer, so I plan to make a few more to test my modification ideas. Tho' first I want to finish (ok, start, {I've been dithering over which pattern to use}) a dress for my cousin's 60th birthday party next weekend.

Sunday 5 July 2015

Prototyping

I've been testing out a few blouse patterns. I haven't sewn many blouses. My friend Flo once remarked that blouses are sometimes more work than dresses and only half of you is covered at the end. Nevertheless, I don't like the way RTW blouses fit. Or rather, don't fit. They are usually too tight in the biceps and too tight across the back so here starts my testing.

First up, Maria Denmark's Edith. The simplicity appealed to my tired brain.
Edith blouse, sans collar.
 I made the first one to test the fit and left off the collar. The fit is a little snug across the back so I added about 3/4" to the next one (currently under construction) . I also lowered the front darts slightly tho' you can't tell they are high here due to the busy print.

The arm holes are touch tight so I added a quick-and-dirty (pronounced 'lazy' vent and lowered them in the next version.

In this photo I missed the neckline but the shirt was in the washer when I realized.
 The back neckline was a little high and pressed uncomfortable against the back of my neck.

Back neck.
 Adding the 3/4" may help that for the next one but I scooped out a bit to make this one wearable.

Gape prevention.
 I interfaced the facings but that made the front a little stiff, so I added a 'secret' button to keep things together. I picked this trick up from Jane (an "of course!" moment) so I have now totally justified my blog reading.
Wow! Now that I've written this it all down, that 'simple' blouse was a bit more complicated than I first thougth.
Cropped Renfrew.
 I've made the Sewaholic Renfrew many times. This time I cut if off just below the waist, raised the neckline, and widened the bottom band. I didn't pull the neckband tight enough so it has a bit of a ripple and the fit is a little tighter than I prefer, but it is a good experiment.

Oakridge
 I am mostly happy with the fit of the Oakridge tho' I'm wondering if I should have gone one size smaller. It is a little bit wide in the shoulders.

Facing sticking out on the left side. I should be more careful when getting dressed.
 I added facings as I have not had good luck with bias tape. This is somewhat full in the back. Maybe I'll take the 3/4 inch I added to the Edith out of the back of this one.

 It also might look different out of a drapier fabric. This cotton is a bit stiff and may soften up after it is washed a few times.


The print is of skeleton keys and the buttons were in my stash. I think I got them from an estate sale a few years ago.
Belcarra
 Sewaholic Belcarra I made last year as summer's last gasp. I like it a lot and will make more. Like the Oakridge I'm going to take about 3/4" out of the back as it gapes a bit.


And a gratuitious shot of my tomatoes which were newly planted last time I posted. The whole garden is growing like mad, in spite of the gloomy weather we've been having. The huge rain we had last night, almost an inch, will definitely keep things growing.

Friday 22 May 2015

Off the Rails-But I Made a Whale

Me-Made May photography has ceased to happen. It's not that I've not been wearing self-mades, but I forgot to take pictures for a couple of days, and then the habit was broken.
Also, I've been on vacation this past week and I have been largely rooting around in the garden in grubby old clothes not worthy of photography. 
Tomatoes, just waiting for their cages.

I' have sewn a few baby thing for a new arrival. 
Some receiving blankets, wash clothes, and the whale. Baby S's reaction was somewhat muted when he was shown the wee beast but his dad, who hails from the Maritimes, was quite taken with it. (I may have to make him one). 

As for MMM, for the next week, (and for the actual matches in June,) I'm volunteering for the FIFA Womens World Cup Soccer. This is what will make up the bulk of my daily wear for that time. 
I was even supplied with socks.
I'm still loking forward to watching what everyone else is doing for the last two weeks of MMM.

Sunday 10 May 2015

Me-Made-May Week 2

May is just zipping by. (And both Firefox and Explorer are determined to drive me batty today.)
Sunday -Renfrew Kimono tee, second hand jacket and jeans.


Sunday May 3
Monday -same top and jacket as Sunday and yellow Vogue 1247 skirt. The pink leggings match the hint of pink in the top. (See Barb's Public Service Announcement post on compression therapy. I stand all day, so it's lovely to find fun coloured compression leggings. Mine are from Juzo.)
Monday May 4
Tuesday - Sewaholic Hollyburn re-worked from the poufy pleated skirt and a thrifted blouse.
Tuesday May 5
Wednesday - I wore almost the same out fit on May 7 last year, and then definitely the same one on May 28. I guess I'm predictable.
Wed May 6
Thursday - purple vintage Simplicity.
Thursday May 7
Friday- Sewaholic Renfrew. Earlier in the week I received an email at work suggesting wearing  teal for Ovarian Cancer Awareness Day.  I no longer have ovaries (the triad of evil was removed a couple of years ago, not because of cancer), but to those of you who do, be mindful of the subtle symptoms and be persistent with your GP.
Friday May 8

Saturday -Sewaholic Renfrew with a modified neckline. Saturday was socialize-all-day with three different events. I'm thrilled to have so many wonderful friends, but the introvert part of me wants to spend the rest of the weekend by myself. That won't be happening. We're having a Boxing-Day-in-May party at my sisters for my Dad's side of the family. Again, I have a wonderful family and I am grateful we are all healthy and able to get together, but I'm all peopled out. As Stephanie says, I need time to staccare.
Saturday May 9
I'm happy to note I have worn one vintage pattern this week as well as items from an indie pattern designer.

Friday 8 May 2015

Simplicity 6557 - A Look Slimmer Pattern- in Purple

I vaguely remember my mother wearing the pant suit version of this pattern, so it must be from the early '70s.
I cut it out months ago, but I have only finished sewing it this last week. The warmer weather removed my enthusiasm for wearing corduroy, but a slight cold snap spurred me on again.

 The dress has princess seamed with a v-neck and seamed above the waist front panel.
 The dress was easily assembled but the inverted 'V' of the bodice gave me pause, and, with typical introvert behaviour, I thought about just how to achieve a definite bodice point for far too long. I should learn to do something and then, if it doesn't work, ponder why. I might get more done that way.

I think the dress looks better IRL than in the pictures, and it could be because all the pictures, save the very first one, were taken at the end of the day when I was all rumpled.

 As with many patterns, the sleeve heads are too large resulting in puckering around the arm hole seams. I managed to steam the worst of the wrinkles away, but if I make the dress again, I'll definitely reduce their size.
  I inserted a back zip, but later removed it as I can pull the dress off over my head without the use of the zipper.
The facings and pockets (not included in the original pattern but I like pockets) are made from cotton remnants from the stash as I thought self facings and pockets would be too bulky.

I'm rather pleased with how this turned out as I had to make no fitting adjustments at all.  It's amazing how the way patterns fit changes over the years. The pieces were all well marked and other than the overly large sleeve heads, (that I knew would be just from looking at them, and should have trimmed) everything went together very well. I hope all my other vintage experiments are this successful.

Saturday 2 May 2015

Me-Made May; The beginning

Here we start Me-Made May. I'm afraid there won't be much chatter today. I'm just happy the weather is nicer this May compared to last year. It's still unusual (we're not usually 27 degrees on May 2) but I prefer it to last year's temperatures.
 May 1: Renfrew-Kimono tee and a Hollyburn denim skirt.


May 2: Faux cowl top from a rayon jersey and my giraffe skirt.
 Let's hope I'm a little more energetic next week.
I hope everyone else is having a good start to the month.


Friday 1 May 2015

Me Made May 2015


 'I, Sox of Finished Thread, sign up as a participant of Me-Made-May 2015. I endeavour to wear at least one article of me-made, re-made or thrifted clothing,  each day for the duration of May 2015 and I will try to wear at least one item from a vintage or independent* pattern company each week.

* This differs slightly from the pledge I signed at So Zoe.. in that I didn't mention the independent pattern part.

Now I"ll just have to see how this goes. During the week is easy, but I don't have a lot of me-made play-in-the-dirt clothes for warmer weather, and so far this year, the weather is soooo much better than it was last year at this time.

Thursday 23 April 2015

A Collared Oakridge

Tho' she has absolutely no recollection of this, the Geek found this blouse at a thrift store a few years ago. We both liked the fabric and the pattern,

This is the pattern, not the much more interesting way the camera make it appear in the other photos.

but not the boxy shape.
No fashion blogger would wear this blouse with those trousers.
This picture was taken after I removed the darts.
I tried adding dart to the front and back, that made it fit better in the waist but didn't address the poor fit under the arms.
The shirt was placed in the 'ponder' file for several months.

Tasia then released the Oakridge pattern. It's nice having someone who designs for the pear-shaped among us.

I traced out my size placed, found the blouse, opened up the side seams, and placed the pattern pieces over the existing front and back. After cutting the blouse to the new shape, I resewed the side seams. I didn't change the hem or the collar.

I didn't move the dart, which may explain the drag lines toward my waist even tho' the fit under my arms is better.
 But when you add a sweater, you can't see the imperfections.
 Now I'll see how it fits when I start with a fresh piece of fabric rather than an existing shirt.

Sunday 12 April 2015

Front and Back. Front to Back. Front and...

I'm not the only one who has trouble fitting trousers. It's a common lament on the blogs I read. Only Roobeedoo has managed to nail a pair on the first outing. I'm thrilled for her and I hope I can find my perfect pattern too.
My first attempt, started in January, was a full legged pair, Vogue 8751. I decided to insert use a back zipper because, for me, fly fronts don't always reflect how well something fits. The back zipper was a royal pain, taking me three attempts and I regretted trying to be clever;the fly front would have been much easier.
The results are not what I'd hoped for and I'm not sure if I like the pattern enough to try fixing the problems.


some pulling in the back
But the real kicker was the way the yoke did(n't) fit. I think the pattern was made for someone whose hipline suddenly turns into a waist. Mine tend to taper in gradually.

plus, the pockets stick out
OK. Next. Vintage McCalls 5408 shorts with length added to the legs and pockets.
a prominsing start.
This turned out to be quite hilarious. Again, I did the back zipper for the previously mentioned reason, and again, I should have done a fly front, but if I had, I wouldn't have learned something very interesting...
First off, the fit was verrrrry strange. The back was fine, but the front was incredibly baggy. I puzzled about who this could have been drafted for, because they look very close fitting in the picture. I regret not taking a photo, becuase it reminded me of this (without the pointy bits).

Needless to say, I had to take in the front quite a bit.
The back gaped, so I added a couple of darts. Then I found I had comehow cut the waistband too small
so I added a tab.

The fit at that point was not too bad, tho' the back was strangely low,
 There is a bit of a gap in the back because I didn't pull the zipper fully closed
 while the front was unusually high.
plus the pockets pull in the front a bit.

I'm not sure when the dime dropped, tho' I'm sure the experience among you have realized all along where I've been going with this...

Yes indeed. I'd somehow confused with the front and the back. 
The original  front with added darts and some pull lines.

the original back, that still doesn't fit despite all my adjustments..
I should be slightly offended to realize that because I have no derriere the front fits as a back better than the back would, but this is quite amusing.

So, modified the pattern so I had two 'fronts'.


And tried again. These aren't bad, I just need to take about an inch out of the rise so the waistband sits at my waist.
The weird lighter area is from sitting on my bicycle saddle


I can't believe it's taken this long to get my first vintage pattern sewn and I'm starting to think I should just stick to skirts. I've marked my changed on the pattern pieces and will revisit this trouser thing later.